


Upgrade Kit Rad Radpower
$229.00
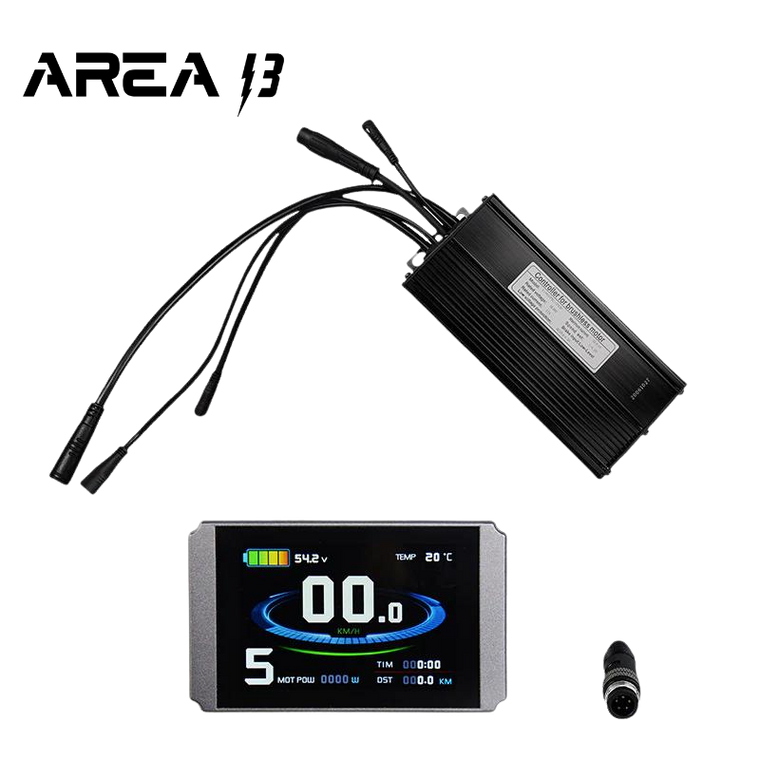
By far the most popular upgrade available, The Upgrade kit includes a new motor controller and new color display. The combination allows you to finally unleash the full potential of the stock motor and battery. This is THE upgrade kit your friends have been talking about.
35a controller and New Color LCD8H.
PLEASE READ FULL DISCRIPTION BEFORE ORDERING. CUSTOMER IS RESPONSIBLE FOR RETURN SHIPPING AND A 10% RESTOCKING FEE.
Plug and play for 2016-2018 Rover bikes. Please note that the controller has a tail light plug that will not be used. We do not recommend upgraded lights as it can burn up the headlight circuit.
Plug and play for 2019-2021 Rover models. (Up to Rover 5) (Not compatible with Rover 6) Will only work with stock 200 lumen headlight, will not work with the 500 Lumen headlights. THE 500 will burn up your controller.
Mini - Although also typically plug and play for 2018 and prior, this controller is substantially larger than stock and will not fit inside the frame or stock mounting locations. May have a different battery plug. Please check your bike and photos before ordering.
Older City or Wagon Models - Untested, but customers have reported it works well. Setting adjustments may be required. Controller may not fit correctly. Additional mounting hardware may be required. NOT compatible with new Radwagon 5.
Rover 6 + STEPOVER & STEP THROUGH- Does not work
Runner - Tested and working on prior models.
Rad 5Expand - works
Mission - Works, we recomend turning max power down.
Runner Two - Untested by Area 13, but customers have reported it is compatible.
Runner Plus - Tested and Working. NOT COMPATIBLE WITH 500 LUMEN STOCK HEADLIGHT.
Works with all European/Canadian models except Rover 6
Compatible with both 48v and 52 batteries. (NOT recommended for 60v)
Dimensions: 7.5" x 3.25" x 1.75"
How to Program:
The LCD screen has a handlebar mounted switch with three buttons, UP, DOWN, and a center Power button. 1. Start with battery and handlebar switch on. The LCD will be off.
2. Turn on LCD by pressing and holding POWER button. Holding the UP button will turn on the backlight if needed.
3. Within 5 seconds of turning LCD on, press and hold BOTH UP, and DOWN buttons for a few seconds to enter the settings mode.
Brief explanations are as follows.
P1 Motor Characteristic Parameter Setting Mode (100, 46 for direct drive motors on the Radcity or some Radwagon models)
P2 Wheel Speed Pulse Signal Setting Mode (5, 6 for upgraded 750w motors)
P3 Power Assist Control Mode (1)
P4 Handlebar Startup Mode (0)
P5 Power Monitoring Mode (15)
C1 Power Assist Sensor and Parameter Selection Mode (3)
C2 Motor Phase Classification Coding Mode (0)
C3 Power Assist Ratio Gear Initialization Mode (1)
C4 Handlebar Function Setting Mode (0)
C5 Controller Maximum Current Adjustment Mode (6)
C6 Backlight Brightness Adjustment Mode (3)
C7 Cruise Function Setting Mode (0 or 1. Setting to 1 enables cruise. While riding, hold the DOWN button to enable cruise control. Using the throttle or brakes will disable the cruise.
C8 Motor Operating Temperature Display Mode (0)
C9 Power-on Password Setting Mode (0)
C10 Automatic Restore Default Setting Mode (n)
C11 Attribute Selection Mode (0)
C12 Controller Minimum Voltage Adjustment Mode (4)
C13 ABS brakes of the controller and parameters of anti-charge control (0)
C14 Power-assist tuning parameters (1)
Press and hold POWER at any time to exit the setup mode.
Troubleshooting
* This is a universal kit. New controller may not fit in stock location and physical size may be different.
I cannot get my headlight to turn on:
Long press the UP arrow to turn the lights on and off.
Pedal assist is not working properly:
- If after adjusting the settings your pedal assist still does not work, check the following cables to ensure they are fully plugged in, check the pedal assist sensor connection. Make there is no bent or pins, and it is fully seated together:
- Pedal assist connector (yellow 3 pin coming from sensor)
- Motor Cable
- Main wiring harness (the one typically ran through the frame). Make sure there is NO bent pins
- If all the connections are good and no damage done to the pins or connectors, try changing the C1 setting to 2.
- If it still does not function, please check to make sure the motor works with throttle to eliminate a different type of problem. If throttle works but the pedal assist does not, the next step would be a different pedal assist sensor, or the stock motor controller and display. This should narrow down where the problem is occurring.
“Motor position sensor fault” or “Motor or controller short circuit fault!”:
In nearly all cases of receiving this error, the motor cable is not fully seated. Please note that the arrows can sometimes be up to 1/8th turn off. The cable should be firmly seated with the lines around the circumference of each half of the plug nearly flush. Wiggle back and forth on both cables and push firmly together.
I have a 48v battery, but it says 53v (or similar):
This is perfectly normal. A 48v battery when fully charged will be about 54 volts.
My battery voltage is over 48v, but the gauge reads empty:
Take the bike for a ride! Depending on settings it may be waiting for calibration. A few seconds of riding should fix this. If the problem persists, check the main harness connection coming from the controller through the frame and up to the handlebars. Check for any bent pins. A single bent pin will cause issues.
My speed does not read correctly, it jumps up to 49mph when coasting (and/or reads 0):
Please verify your P2 setting. An incorrect setting here will cause the wrong speed to be displayed when coasting. Also make sure you have the correct wheel dimension (DIM). The dimension is the overall tire diameter, not just the rim size. P2 = 5 for stock motor. P2 = 6 for upgraded Bafang 750W motor.
RadCity and RadWagon (direct drive motor):
Note that some settings may need to be changed for proper operation. P1 is determined by the number of magnets or poles in the motor as well as the gear reduction. As the RadCity and older RadWagon have a direct drive motor, use the setting 46 for P1. P2 may also require a change for a correct speed reading.
Motor or system shuts down while riding:
Adjust your C5 setting to a lower current output. Settings 0-2 are different take off speeds followed by max power. 3 is the lowest current output and 10 is the highest. Take the bike for a spin and adjust the current output till you find a happy medium the controller and motor are happy with. For stock motors, we recommend 5 - 7 for C5.
CHECK OUT THIS YOUTUBE VIDEO FOR STEP BY STEP SET UP. https://www.youtube.com/watch?v=B0F6x8V0NZQ
*The Upgrade Kit is created for specific models of Rad bikes, and that name is used for part compatibility or identification only. We are not affiliated with that company and this item is an aftermarket part.
Related Products
-

-
-
-
Radpower LCD8H Display
$89.99


Reviews
-
Exactly what I needed
I have a Rad Power Rad Runner Plus. This product works perfectly with it. The controller is well made and is about the same height and length as the stock controller (a little wider). I was able to install it under the bike where the stock controller was using the stock hardware. Note, that I was not able to attach the metal guard that covered the stock controller, but this new controller is metal and looks more rugged then the stock controller's plastic housing. So I do not feel the metal guard was needed. The improved display (kt-lcd8h) is also really nice. It is far more configurable than the stock display. However, it does lack good documentation. The included pamphlet is insufficient. Bolton/Area13 does include recommended settings for configuration that will get you going. They also have a Youtube video that covers many of the setting parameters (https://www.youtube.com/watch?v=B0F6x8V0NZQ). For more in-depth details, you can find the full-length manual online (directly at http://www.szktdz.com/upload/file/20180814/20180814091428_61636.pdf or, if that link is broken, by googling KT-LCD8H E-Bike Display manual). Using this guide, I was able to adjust a few settings that other might find useful. The primary setting that I would suggest changing is C5 (Controller Maximum Current). Values of 0, 1, or 2 allow for soft, gradual starts. This is very useful if you find that your bike wants to pop a wheelie or throw off passengers when you accelerate (especially from a stop).
-
Wow!
A huge increase in torque. Easy install on Radrover step through - took about an hour. I see no need to upgrade motor or battery after installing this. Can't wait for my hydraulic brake order to arrive.
-
Excellent upgrade!
Easy installation, had on in 30 minutes. Sent everything needed, went right on. Should have done this years ago, goin riding!!!!!!
-
Easy install, powerful upgrade, popping wheelies!
had this on quickly and with minimal effort. one thing worth noting is the cables can be kind of tight getting them all tucked away on the Radrunner with this upgrade. I love the cruise control function! I am getting 24 mph top speed according to the lcd, and using the recommended settings for the Radrunner with this upgrade found on youtube. I've only used this for a couple of rides so far, but based on the increase in power, I would bet this will drain the battery much faster as well but this is the tradeoff we get for speed/acceleration increase. screen looks great and I'm impressed with all of the functions it provides, trip meter, speedometer, odometer, avg speed, top speed, cruise control, and plenty of customization available for readout. ample bright to see in the daytime. I will be taking precautions to prevent the controller and screen from getting wet, and wont be leaving them out uncovered in the weather.
-
RadRunner 2 Upgrade!
Just received my RadPower Upgrade Kit and installed on my brand new RadRunner 2. I was skeptical at first when ordering this upgrade kit, as this is my first e-bike, but let me tell you it does not disappoint! It installed with relative ease and I was up and running within 30min. All plug connectors matched up just fine, but I will need to 3D print a bracket offset to support the motor controller for attaching to stock mounting holes. Right now its held on with a single bolt and a zip tie for testing. While the base model RadRunner 2 is certainly awesome, no doubt, it does seem to lack torque on the smallest of hills. I imagine this is typical of most e-bikes restricted by current regulation. If you are looking for a bit more kick up the hills and an awesome display, then this upgrade is for you!! Would be 5-stars if the documentation was a bit better on programming and setup (specific to RadRunner). I'm a mechanical engineer and had to scratch parts of my brain I haven't touched in years. Programming could be challenging for some, but not impossible. Tacoma, WA
-
Excellent.
Took about 45 minutes to get it on and secured due to space and reorganisation of the cables. Time well spent. They upgrade makes a huge difference, plus the screen is nice to have.
-
Great product. Works very well on 2022 RadExpand 5. Easy plug and Play.
This installed perfectly and easily in space where original controller is located behind battery tray on seat down tube. I installed using two vertical strips one over the other for thickness, of 3M foam tape and 5 zip ties. Light cable is routed through cable route on side of enclosure. The 3 zip ties secure the cable in the routing area. I used electrical tape to cover wire so it doesn’t wear insulation. I imagine that the RadMini StepThrough 2 would be exactly the same installation. Instant noticeable torque and improved available power. No more slow start getting up to speed. Using controller functions on display, on full charge, bike does well at 25 mph, I am 180lbs so I am impressed. I set wheel size to 23” because that is the closest OD dimension for my wheel. The MPH and mileage distance are only off by .2 which is negligible. I am using stock RadPower 500Watt, 750W peak motor. Can hardly wait to get the true 750W motor to see that difference. I imagine it will then be a class3 e-bike at 28mph. Then this e-bike will truly sing.
-
Rad MiniST2 - holy smoke!
Yep, this upgrade is plug-and-play and drops right into place on a 2021 Rad Mini Step-Thru 2; everything works, including the rear tail/brake light and all other functions (plus all the new ones provided with this controller). Connecting things up under the crank is just a bit finicky due to short lengths of a couple factory cables on the bike's frame, but a little patience and using pliers to hold one side of a connector while lining up the other side does the trick. I haven't done a final strap-down of everything yet (just lashed into place temporarily for testing) but I think a couple UV-protected and heavy-duty zipties, plus maybe a strip of heavy-duty velcro just to be sure, will hold it in place securely. The LED display is colorful and very full-featured, but a little hard to read in direct sunlight compared to the stock LCD; it'll be fine though. And wow, does it perform! With settings recommended on the radowners(dot)com forum to start with, it feels like I just installed a booster rocket under the seat; with the ramp-up settings at normal/medium I'm almost intimidated to try the stronger setting - it just launches and doesn't stop, so be careful with it on first try, especially don't blip the throttle unless you're on the bike! I took it up to 1,500w easily and it was still going, so those last two big hills in town will fall before the mighty Area 13 controller! Combined with A-13's hydraulic calipers, she also stops like hitting a brick wall. Love this combo!
-
Rad Rover 5 upgraded
Huge difference. Video review on the product is accurate. They have now included the longer bolts needed to mount the controller using the stock clamps. (Bonus). On that note however, I am nervous about the quality (toughness) of the controller case. It is "good?" but appears to be a "lighter" build then the stock case. For peace of mind, I believe I will order a controller box to mount the controller inside to protect it from weather. It was "Plug and Play". Once installed, I entered the recommended settings and it worked and it worked as claimed. Acceleration is night and day better, throttle response is smoother.