
Area 13 upgrade kit for RadRover 6+
Installation and setup instructions
-
Remove the battery from the bike and set it aside.
-
There are 4 small silver screws underneath the battery holding the metal tray in place. Remove these and set aside.
-
-
Remove the 2 black screws holding the lower portion of the battery cradle. These require a T10 Torx Bit. One is countersunk and one is not, pay attention to the type of screw so they are reinstalled in the correct locations.
-
-
You may need to trim off any excess zipties holding the cables together underneath the bike to remove the lower portion of the cradle. Be careful not to cut any of the wires or cables on the bike. The battery cradle/connector can now be unplugged from the motor controller.
-
-
Run the battery cable down through the frame (as opposed to the stock configuration of running up) and plug into the new motor controller. It’s the only 2 pin connector.
-
Remove the stock motor controller and plug the 11 pin connector coming from the bike’s wiring harness near the bottom of the frame to the new motor controller. Look for the directional pin on the connector, it will only plug in one way. The arrows on the connectors and the logo should line up as well. The motor controller sits just behind the seat tube with cables running down through the triangular shaped hole in the frame.
-
-
The last plug is for the motor.
-
Reinstall the battery cradle connector into the frame with the 2 black screws.
-
Reinstall the metal tray and 4 silver screws.
-
Tidy up the remaining loose wires under the frame and affix the controller securely to the frame as well with the provided zipties.
-
Remove the stock display and buttons from the handlebars. Replace with the new display provided. There is a single connector for the display.
-
Double check all connections


NOTE: There are 2 versions of the RR6+ upgrade kit. The newest version has the following display and settings:
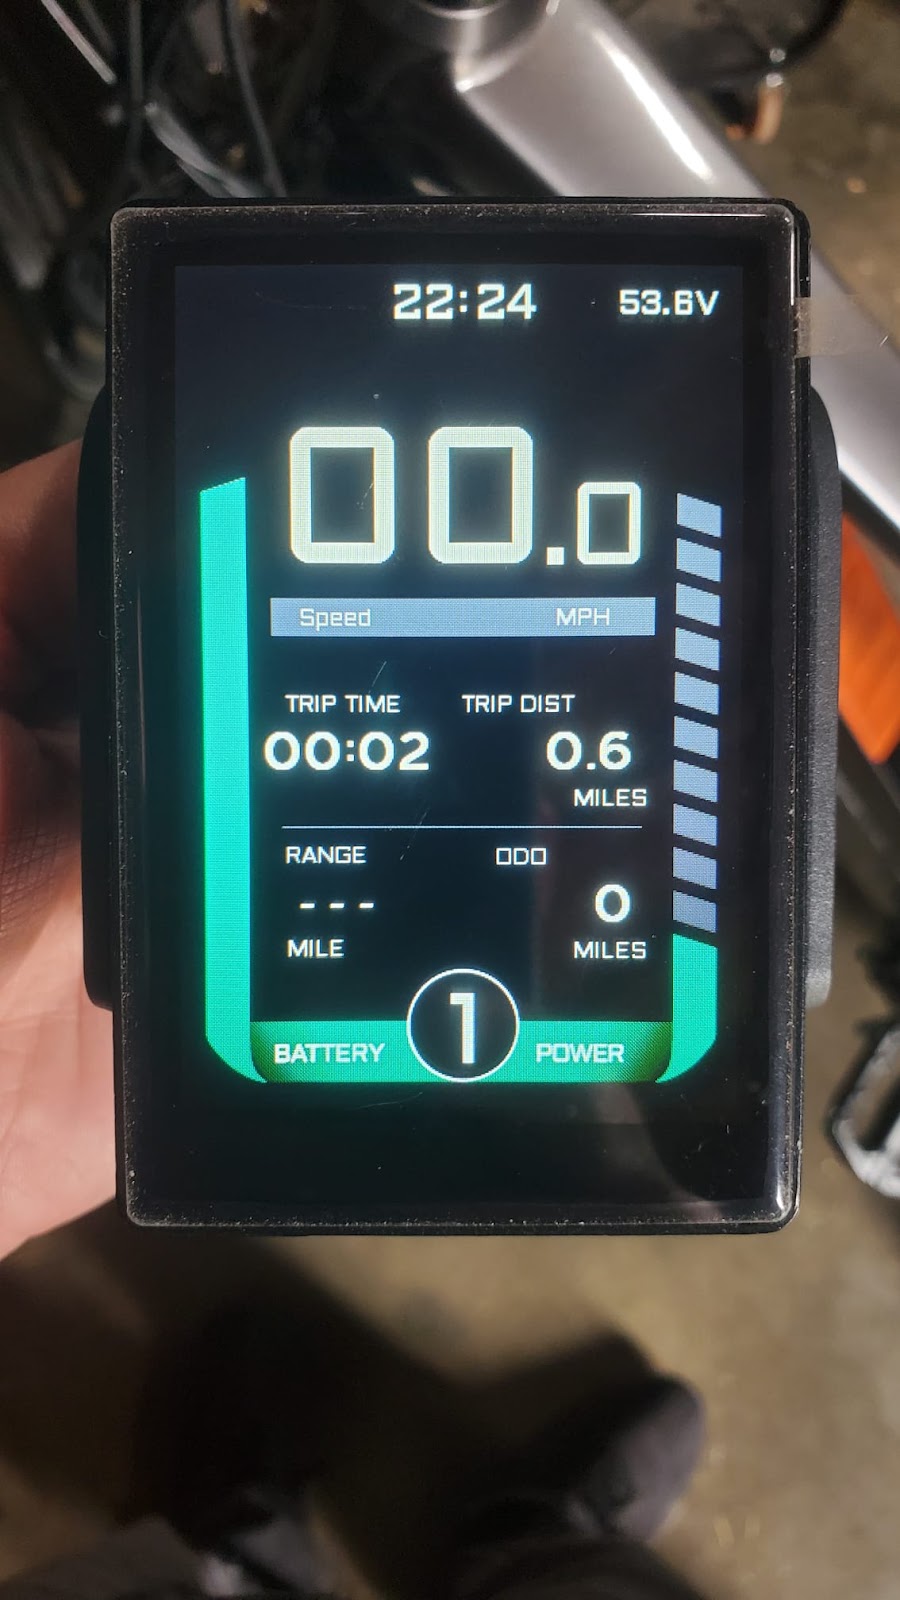
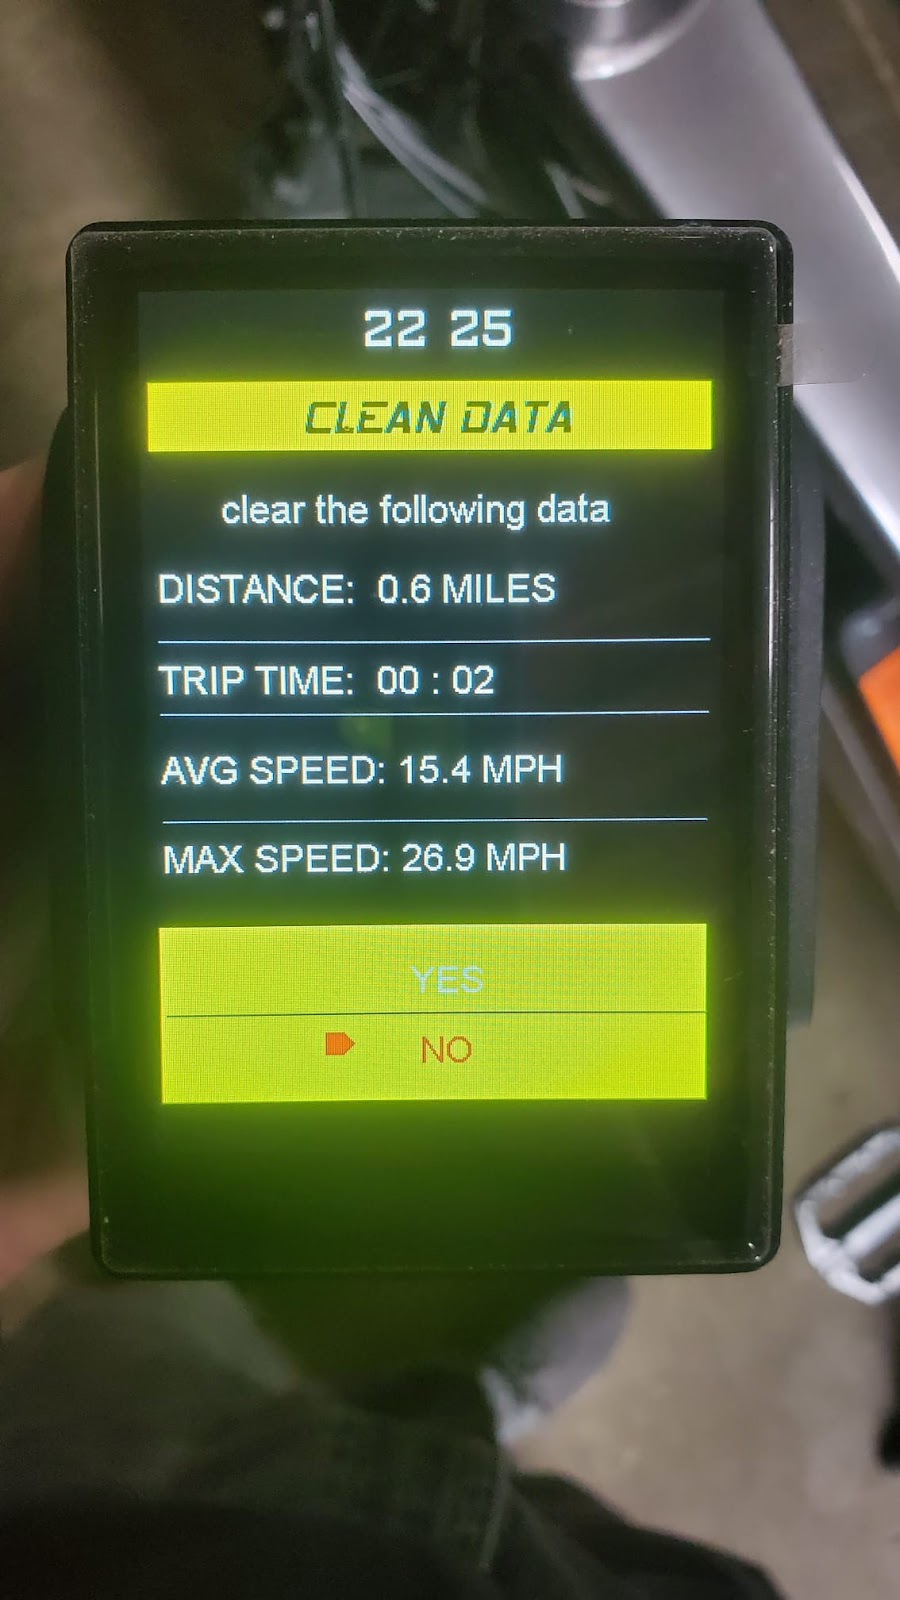
Hold the orange power button to turn on the display. Pressing the middle “mode” button will allow you to cycle between trip time, mileage, max speed, average speed, etc. Holding the mode button will allow you to reset the trip meters.
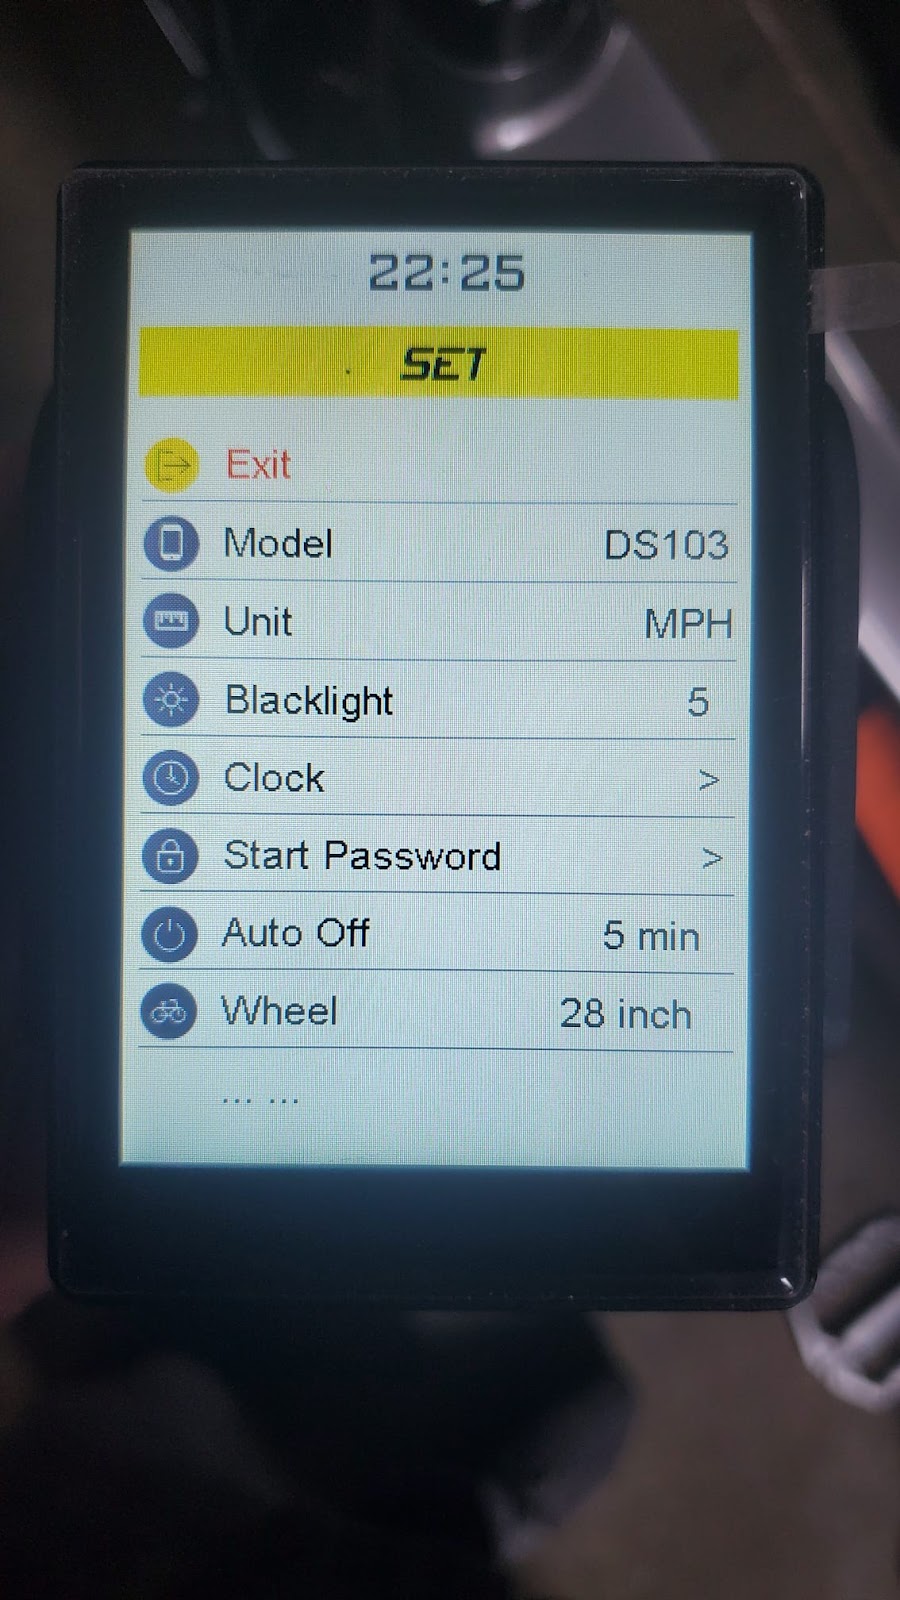
To enter the settings menu, hold the center mode button within 5 seconds of turning on the display. Use the + and - buttons and the mode button to change settings. Some settings must be changed in the “advanced” menu.
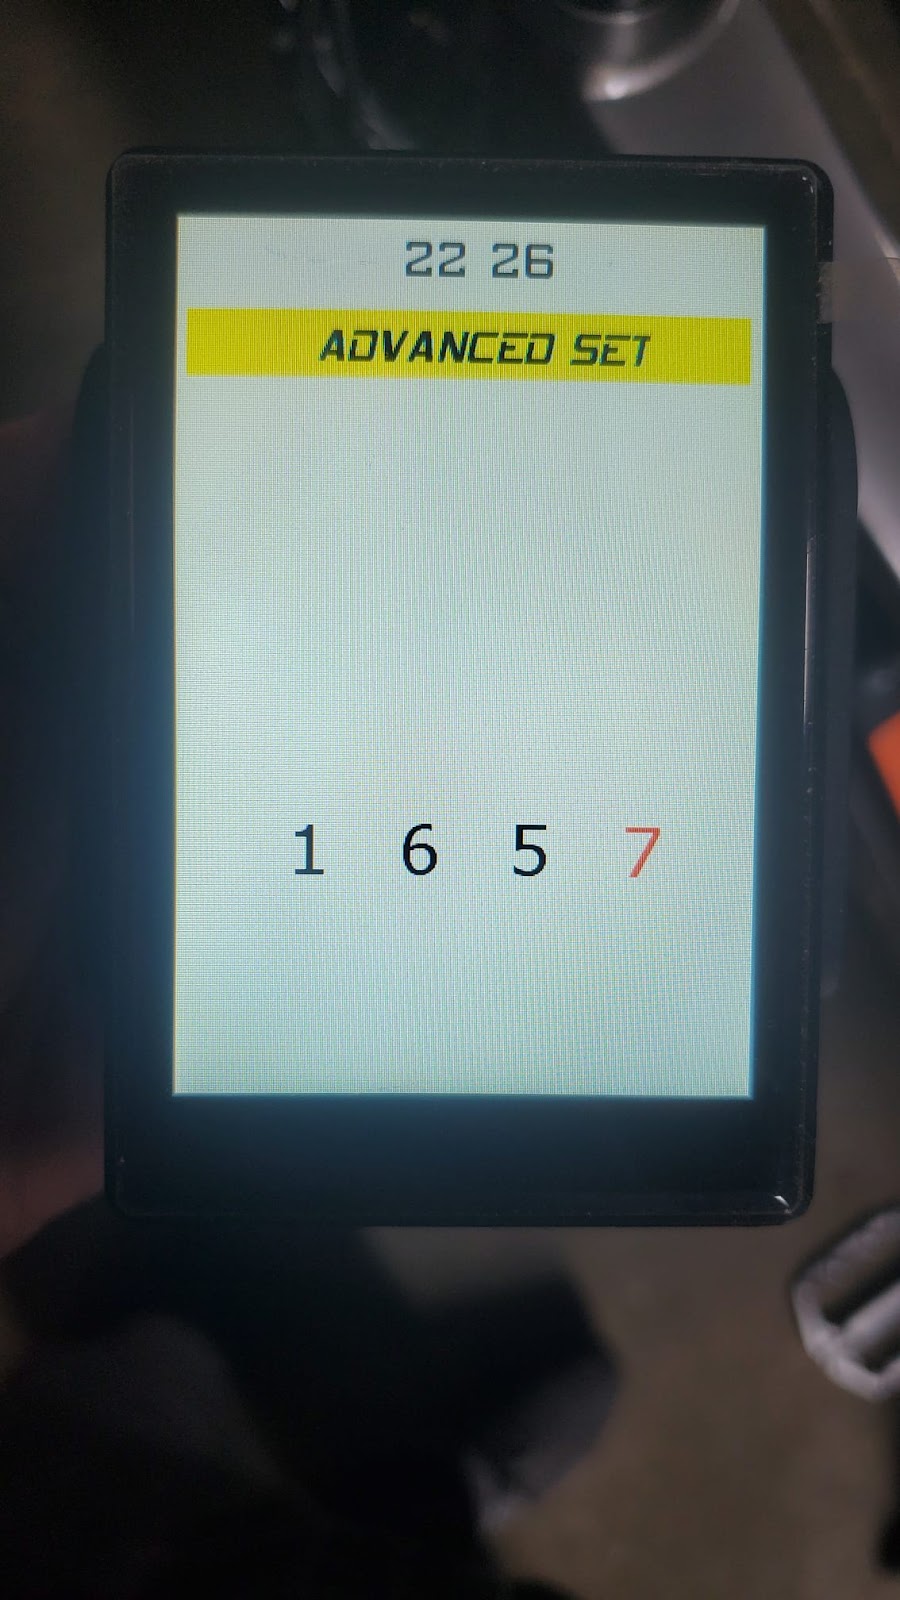
If selecting the advanced menu option, (P-SET) a passcode is required. The code is 1657.
Auto off - the time after which the display turns off automatically if there is no activity on the bike.
Wheel - The diameter of the wheel for proper speed calculation
Speed Limit - The max speed limit allowed
Units - MPH or KPH
Backlight Brightness
Clock (actual time)
Start Password - For setting a lock screen password - THERE IS NO RECOVERY OPTION IF THIS IS FORGOTTEN!
P-SET - For proper operation of throttle and speed, please change the following:
Wheels Size to correct diameter
Speed Poles should be set to 1
Booster Poles 64
Start After Poles 3
Slow Start default is 2
Booster Direction is 0
Voltage (can be adjusted if a different readout is desired)
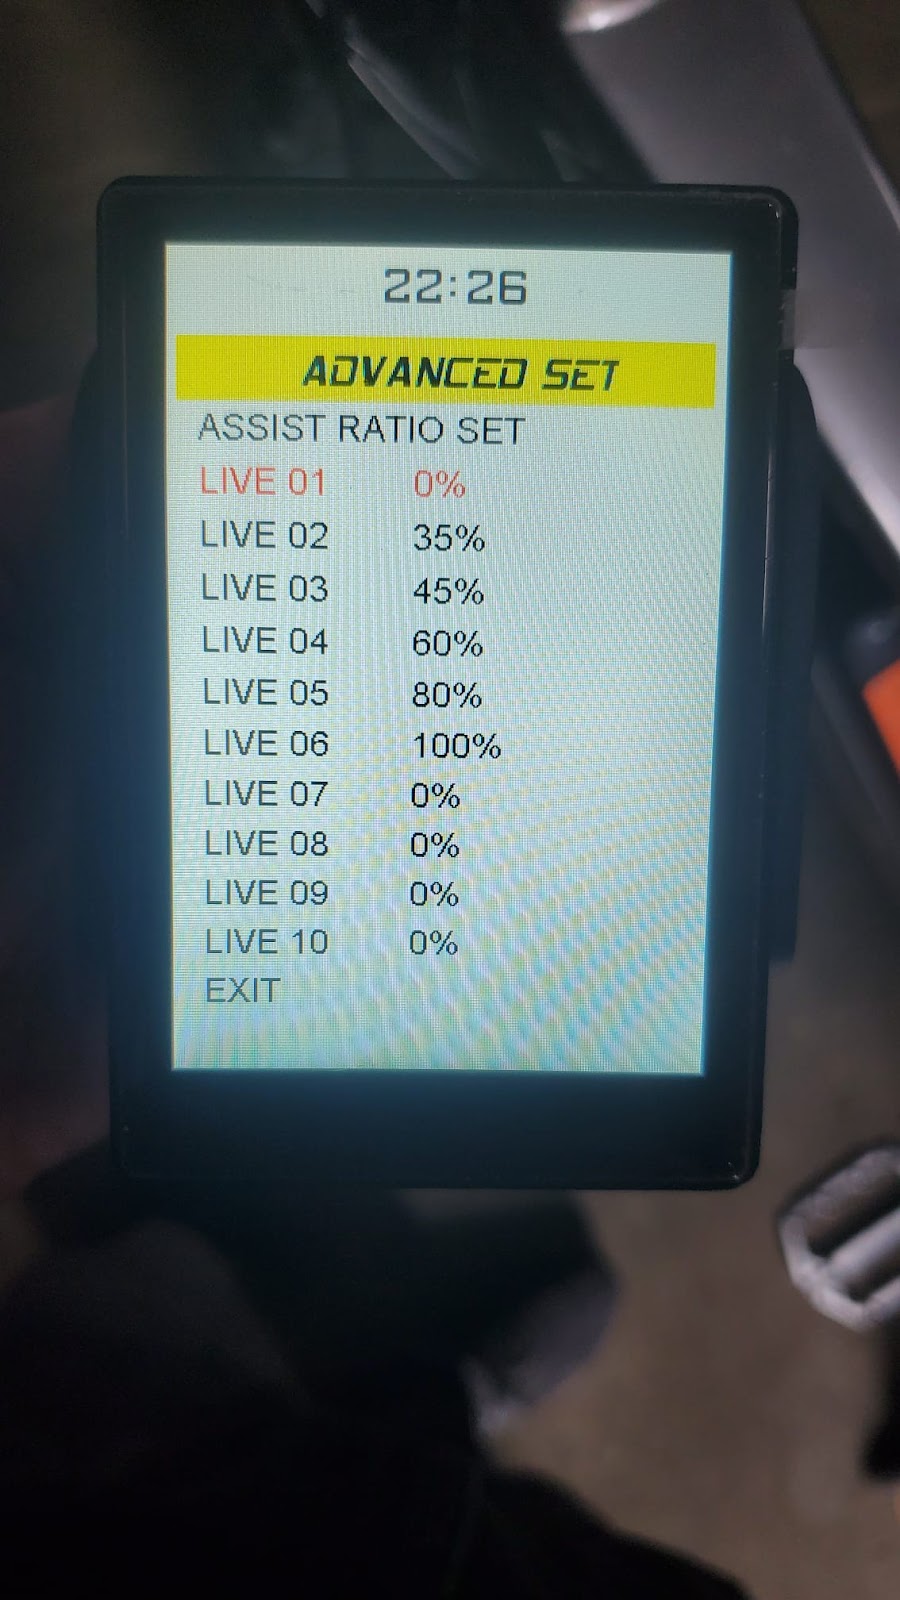
Assist Ratio can be adjusted for various power levels in assist 1-5.
Turn Gear - Set to 0 so throttle works at full power on PAS levels 1-5
Select Exit to return to the main screen.
The front light is powered on by holding the + button.
Please contact us for any additional help or installation support.
Area13Ebikes.com
530-615-0565